Create a Budget in Excel
This example shows you how to create a budget in Excel. Follow this step-by-step guide and take control of your finances.
1. First, enter the different types of income and expenses in column A.
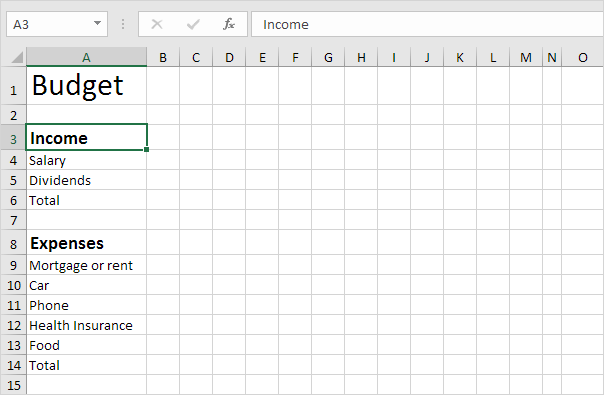
Note: on the Home tab, in the Font group, you can use the different commands to change the font size and font style of text. Click on the right border of the column A header to increase the column width.
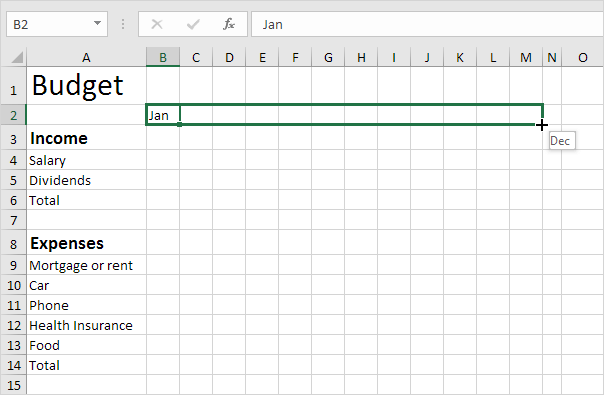
2. Enter the word Jan into cell B2. Next, select cell B2, click the lower right corner of the cell and drag it across to cell M2. Excel automatically adds the other months.
3. Enter some data to get started with budgeting.
4. Enter the SUM function into cell B6. To achieve this, select cell B6, type an equal sign (=), enter SUM(, select the range B4:B5, close with a ")" and press Enter.
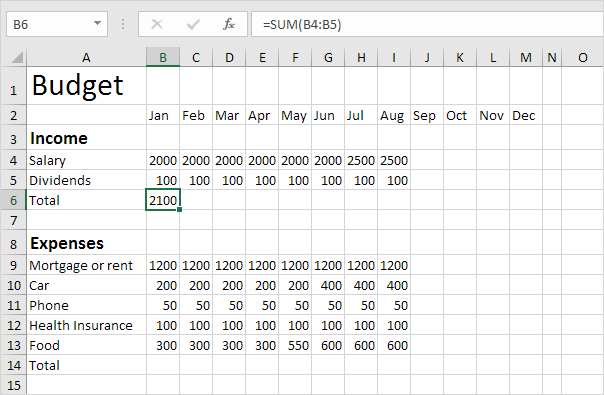
Note: on the Home tab, in the Font group, you can add a top border.
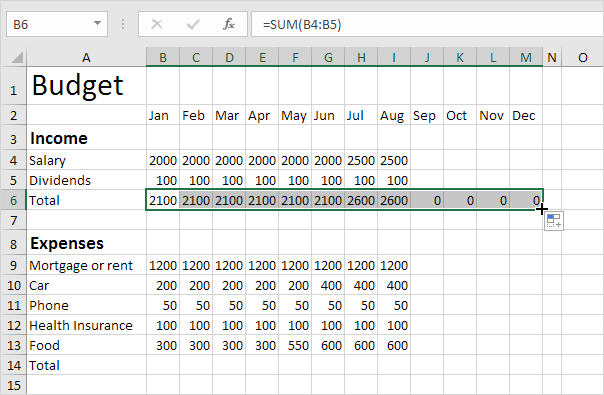
5. Select cell B6, click the lower right corner of the cell and drag it across to cell M6. Excel copies the function and border to the other cells.
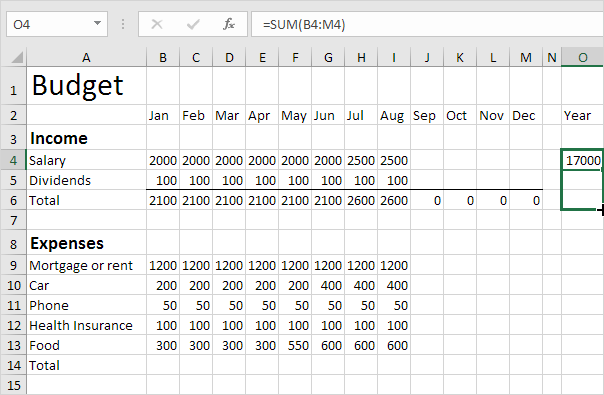
6. Enter the SUM function into cell O4. Remember, select cell O4, type =SUM(, select the range B4:M4, close with a ")" and press Enter.
7. Drag cell O4 down to cell O6.
8. Repeat steps 4 to 7 for the expenses.
9. Add a Short/Extra row.
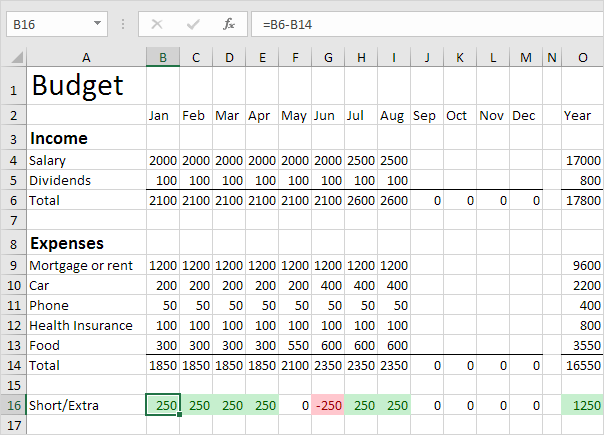
Explanation: we created two conditional formatting rules to highlight cells less than 0 (red) and greater than 0 (green). You can follow the link to learn more about this topic. Maybe this is one step too far for you at this stage, but it shows you one of the many other powerful features Excel has to offer.